
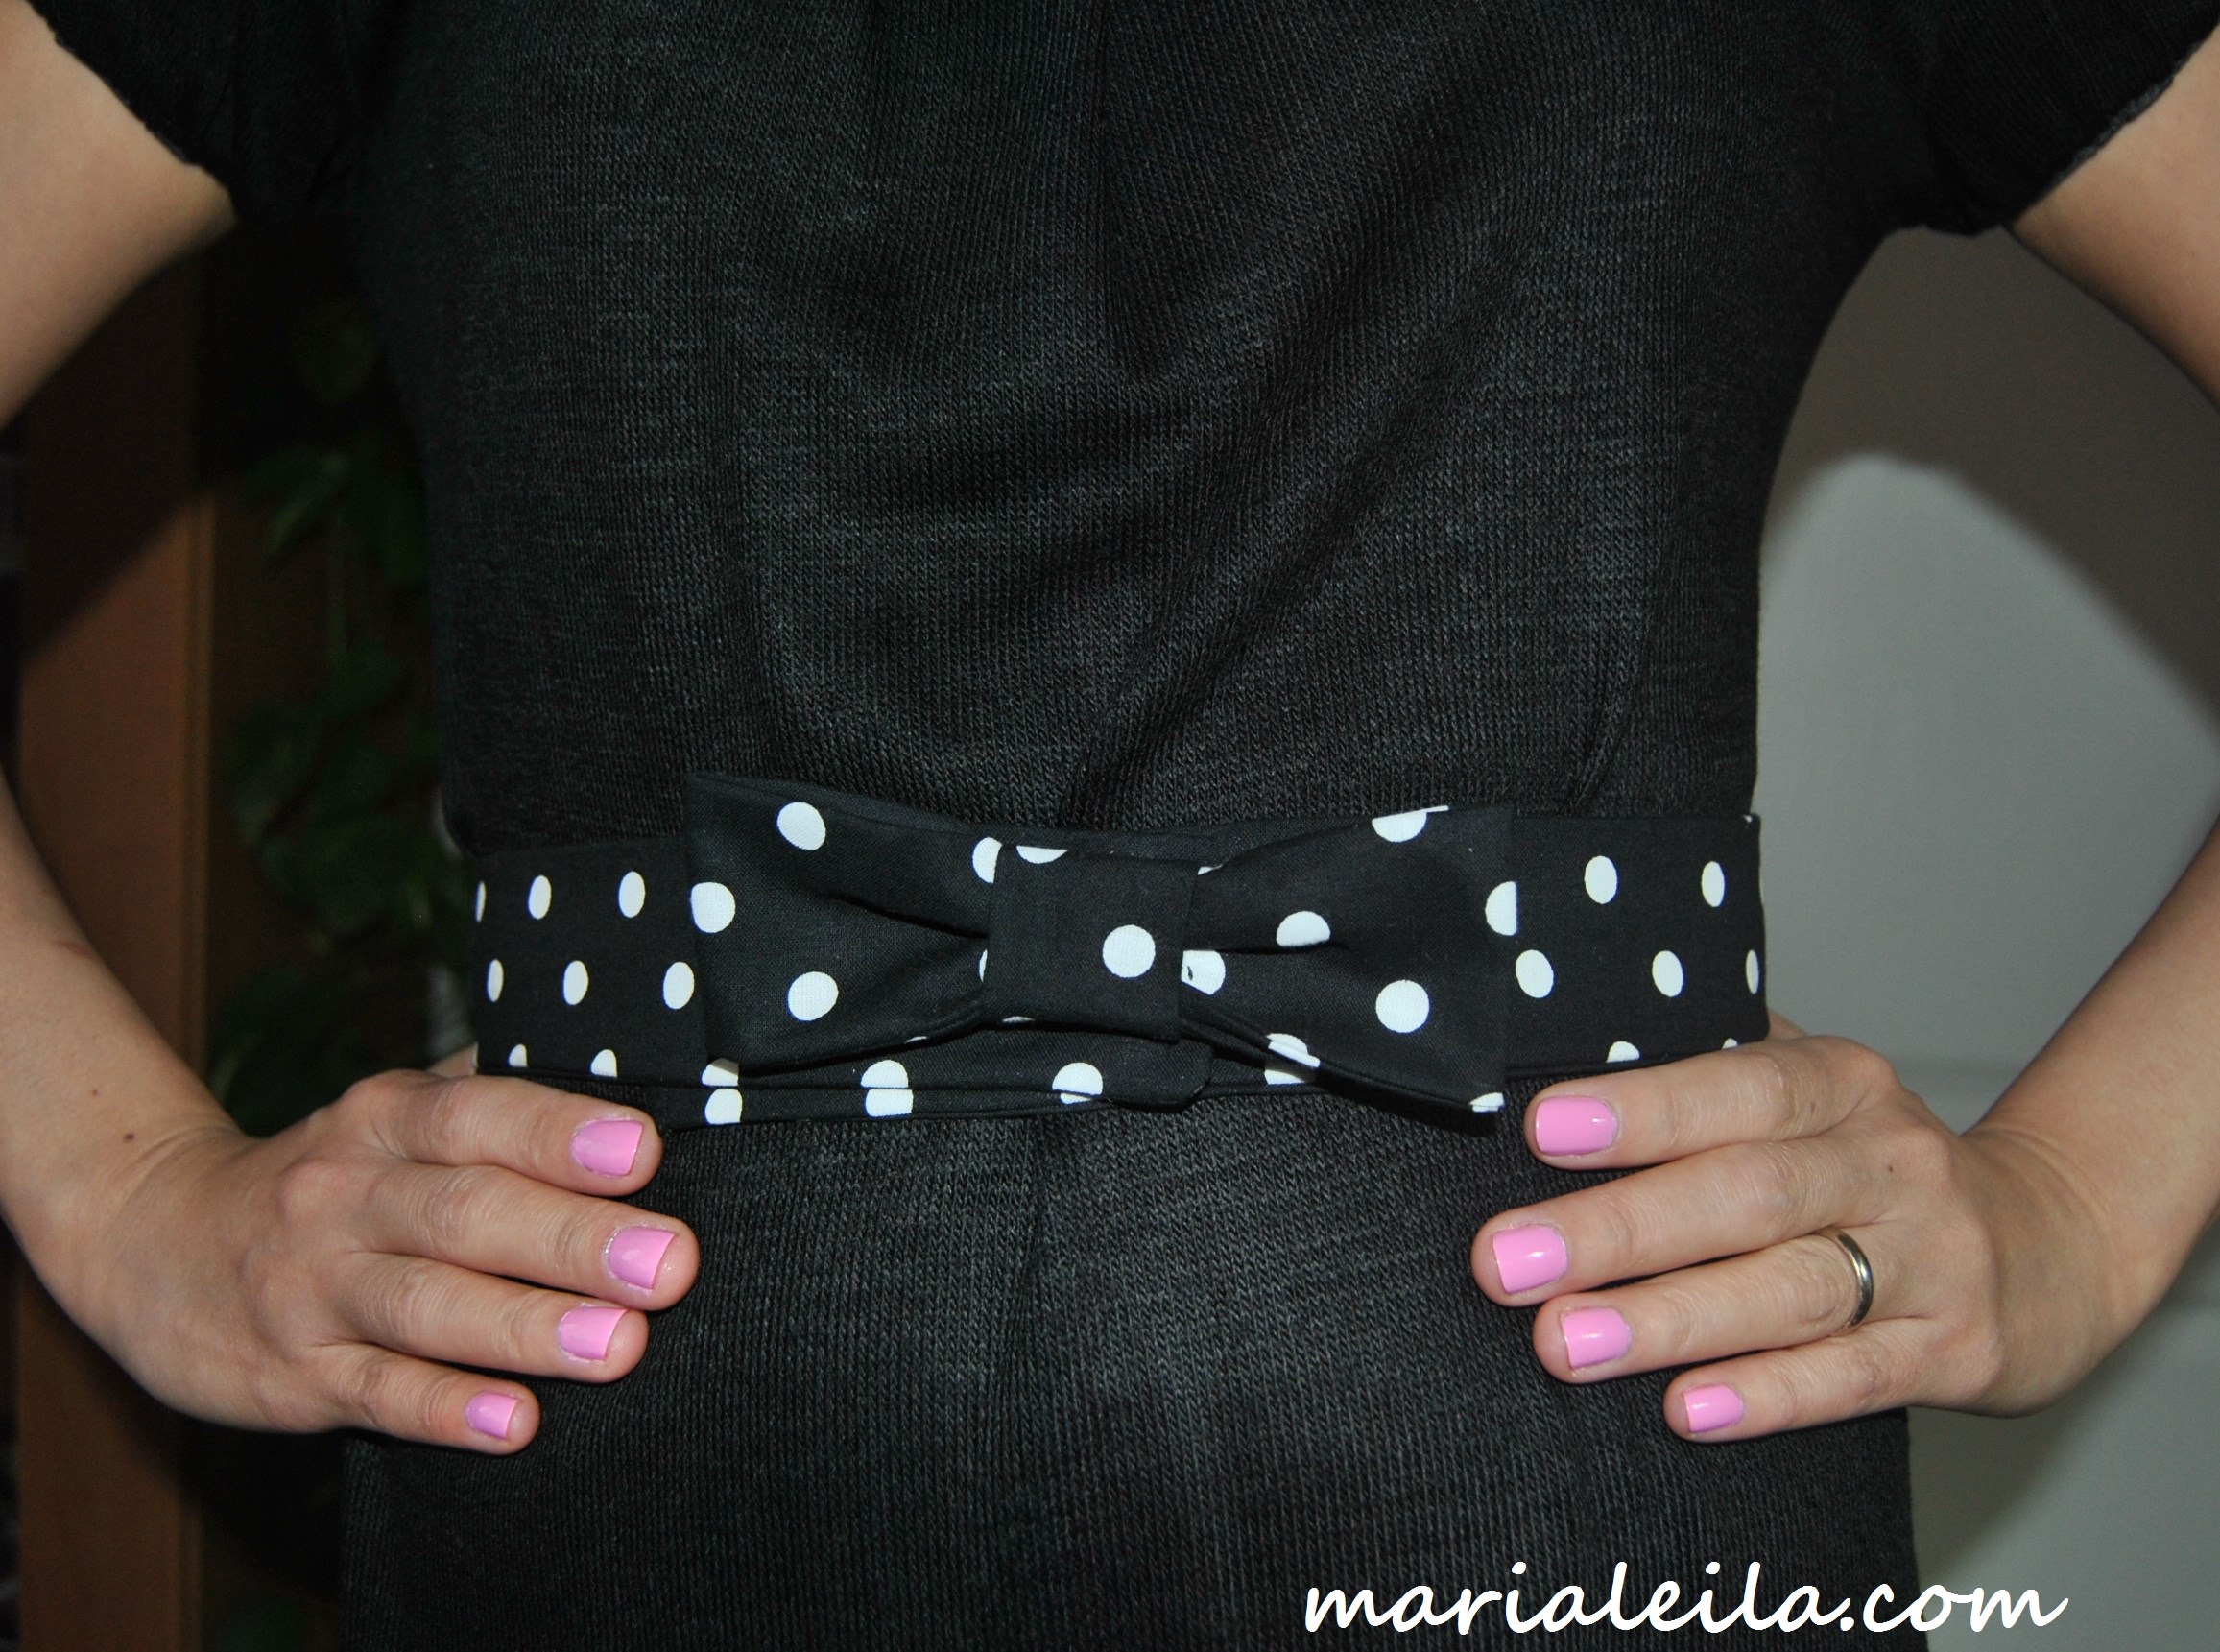
Look world, I made a bow belt!
 Belts can really transform an outfit. My problem is it’s so hard to find a 34-size belt here in Prague. I already spent days looking but the ones I found were not the kind I totally dig. Oh well, the universe kinda operates this way, right? It sort of pushes you to look for another solution which is usually the simplest: If you can’t find it, make it.
 So I made this bow belt on Friday after finally buying half a meter of interfacing. I never heard of it before so I had no idea what it looked like. Lucky me I have a husband who willingly tags along in case I need an interpreter for the shop assistants to understand what exactly I’m looking for.
Okay, on to the materials needed:
- fabric
- interfacing
- hooks and eyes
- thread
- iron
- scissors and the ever-present measuring tape
 1. Cut out three pieces of fabric to the following measurements:
- Belt: your waist size plus 11 cm x 11 cm
- Bow: 31 cm x 12 cm
- Knot: 8 cm x 8 cm
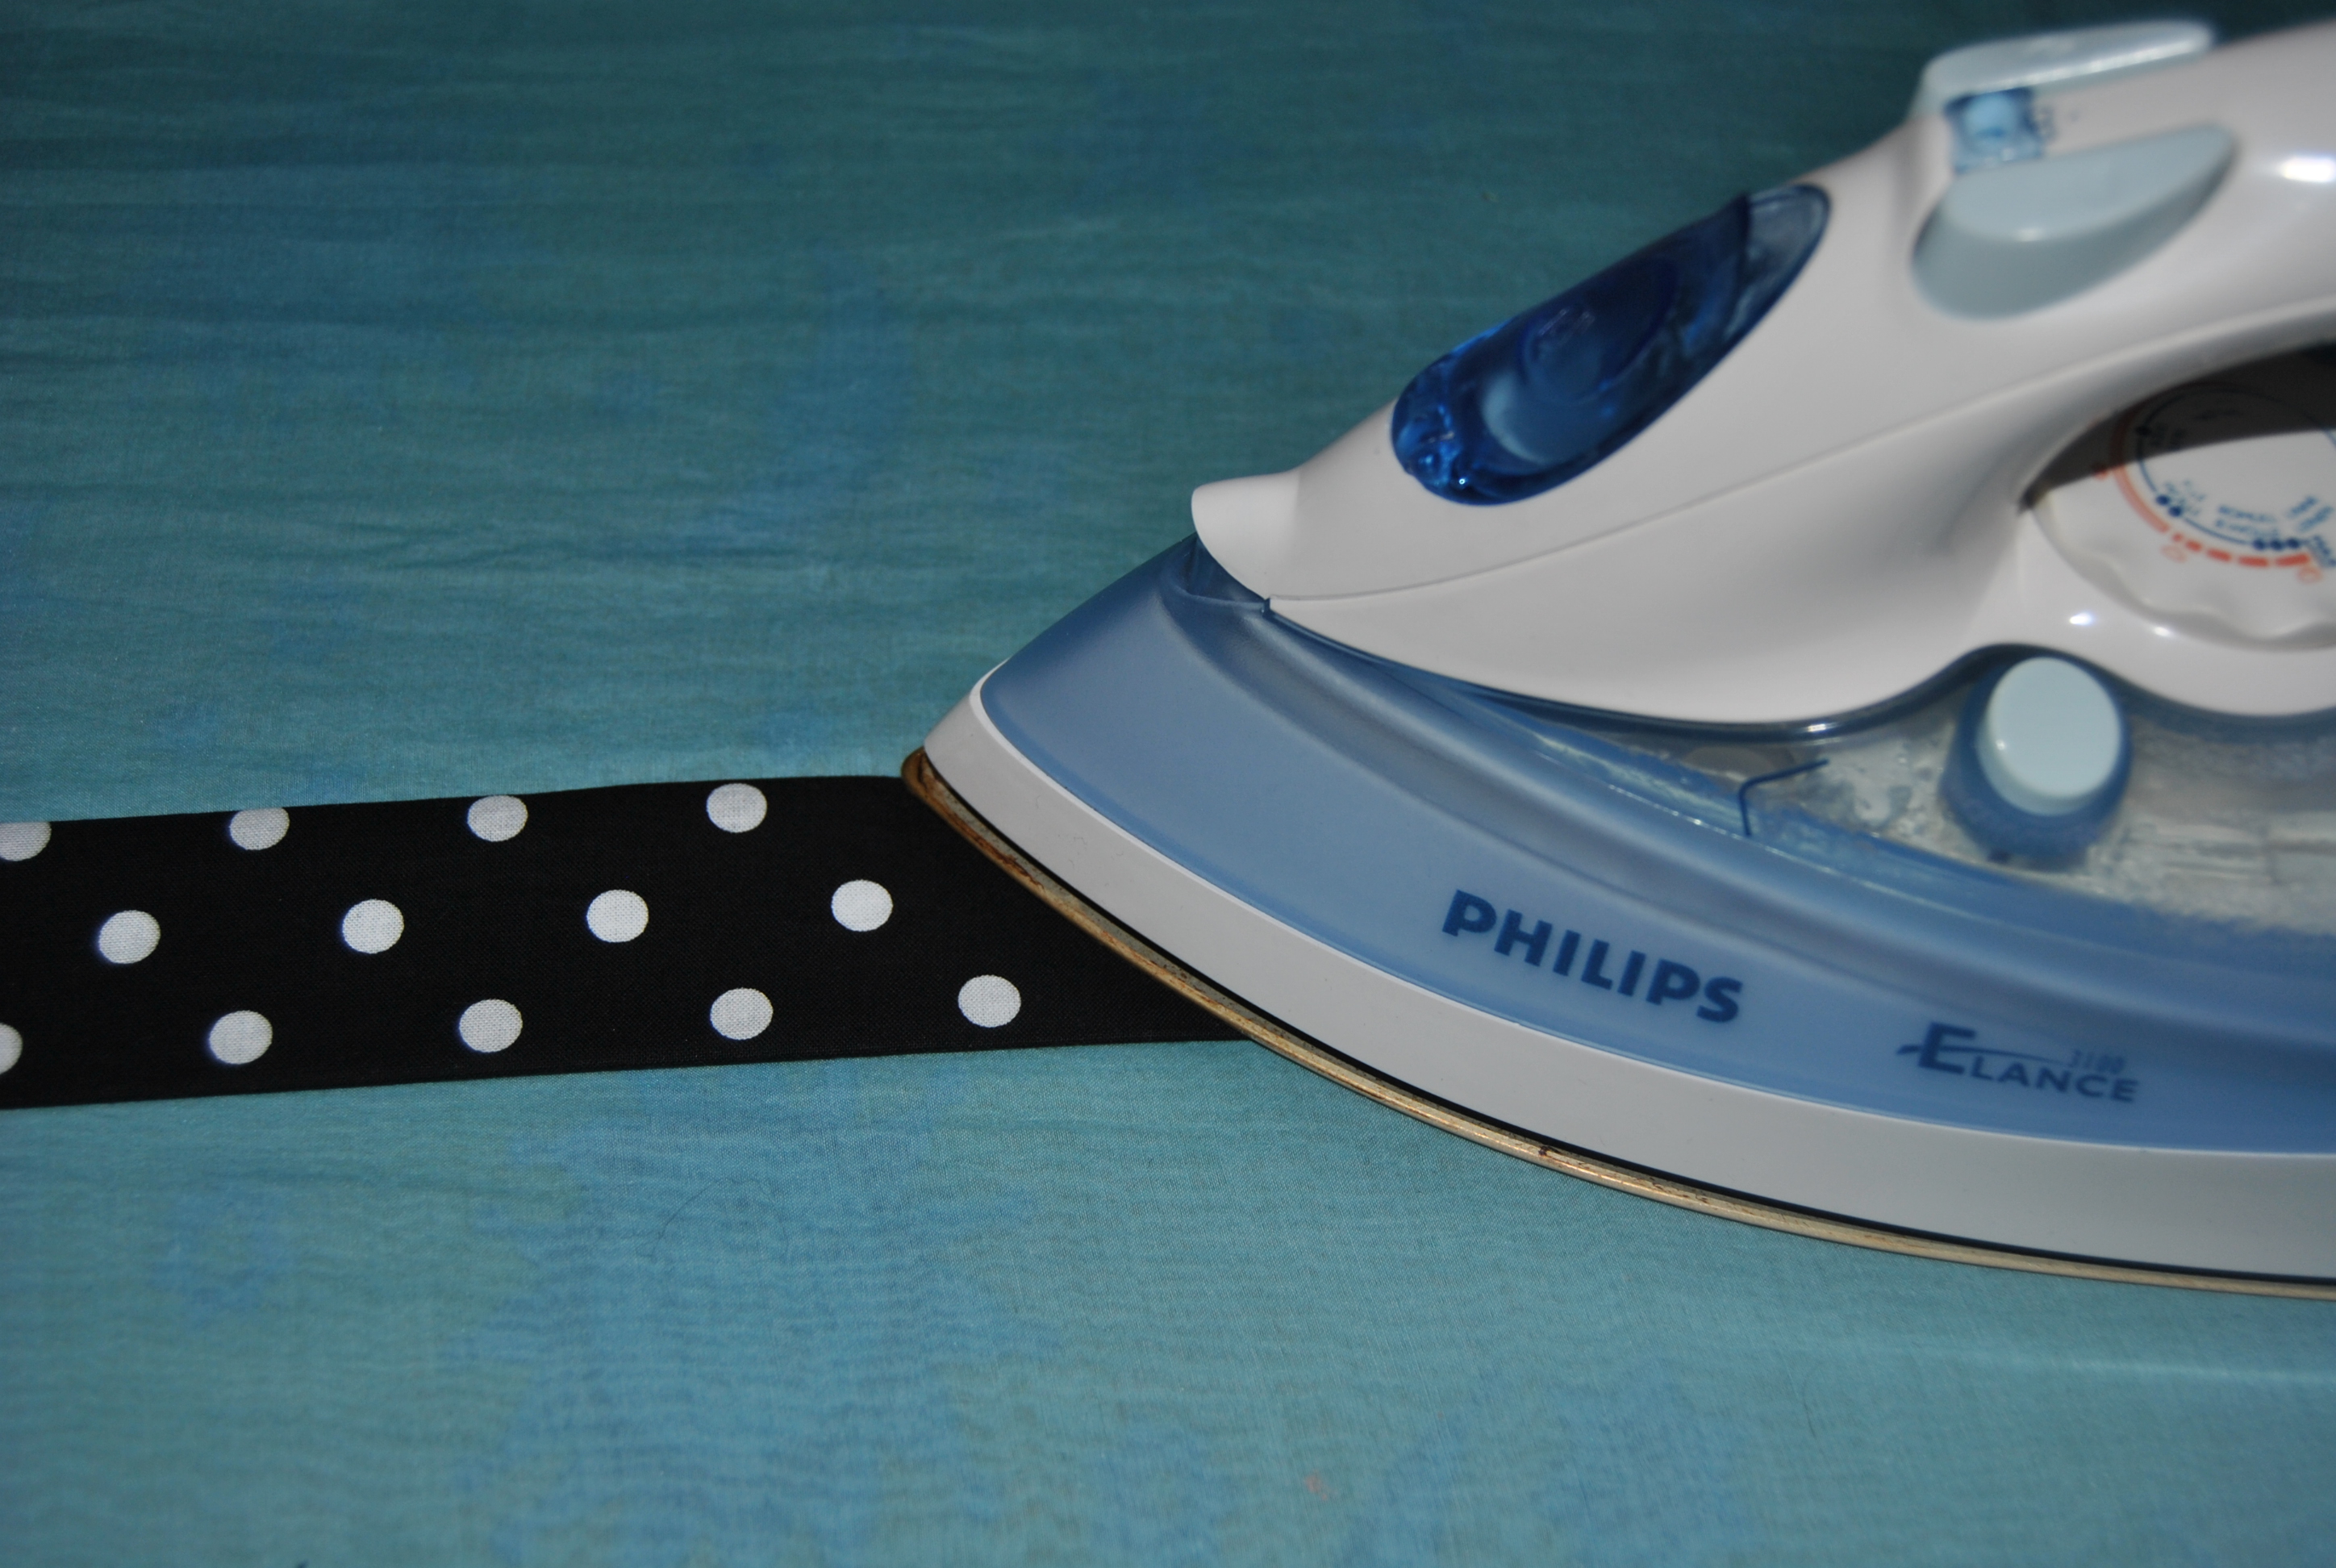
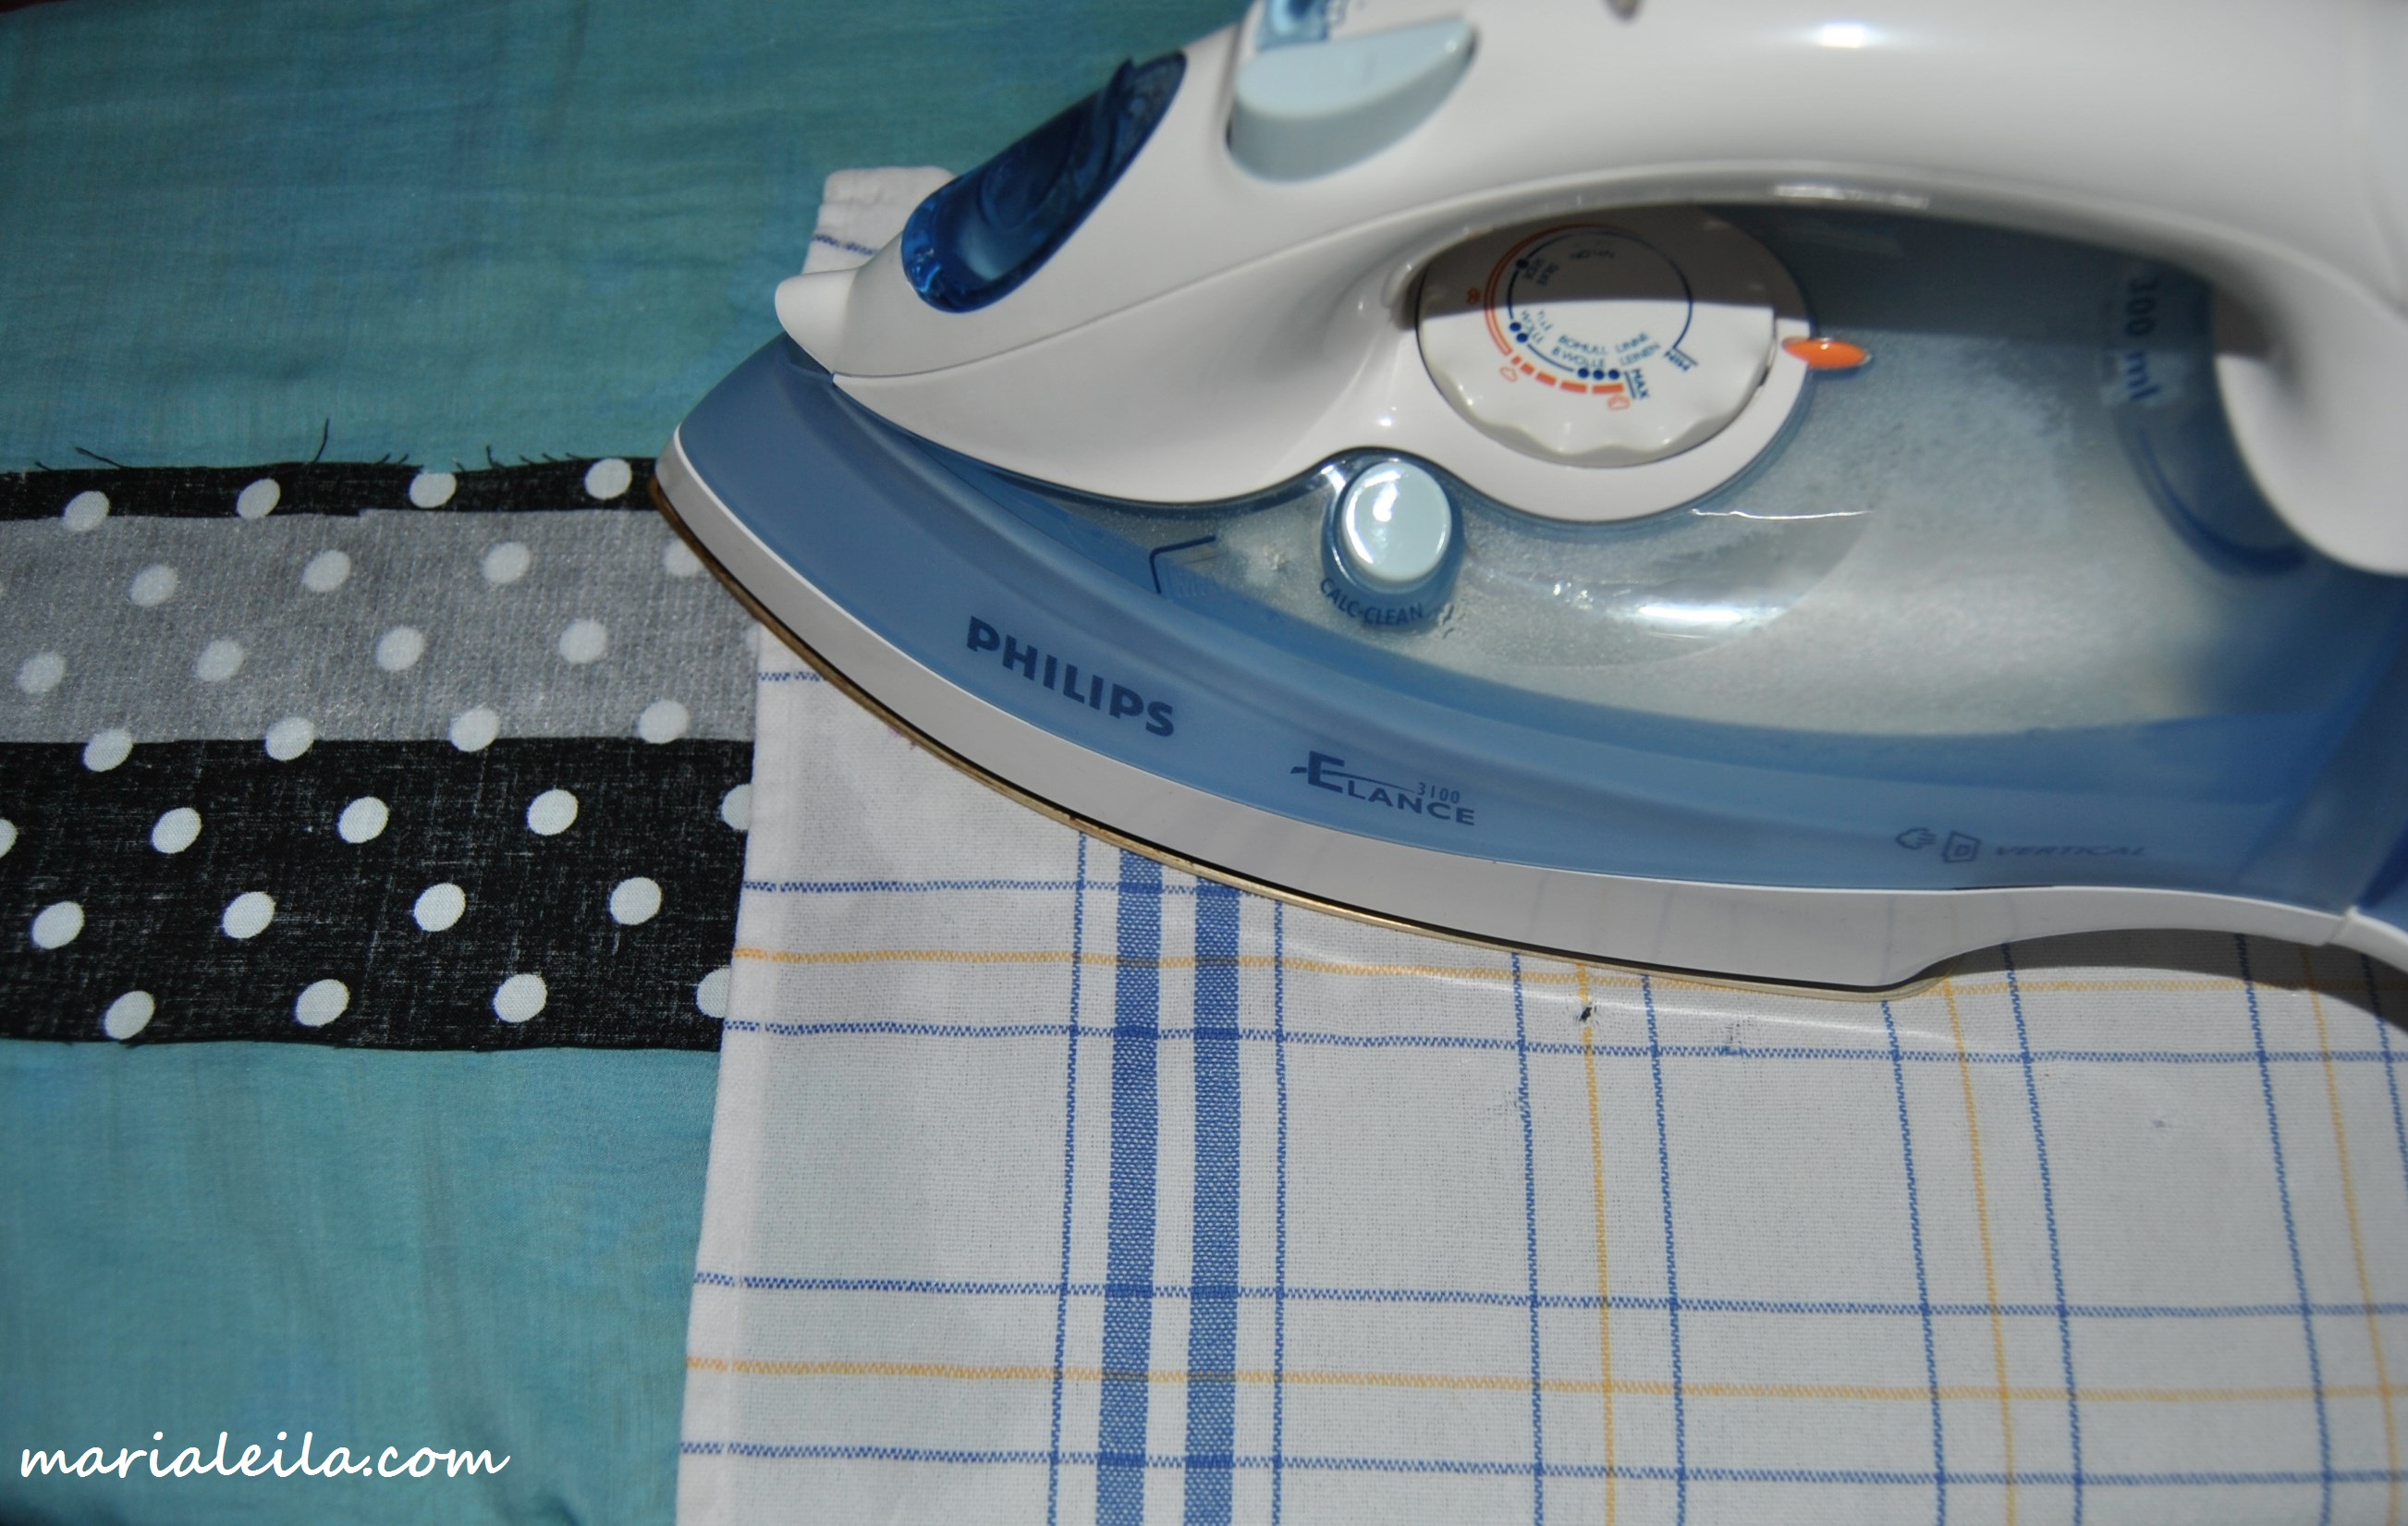 2. Cut out interfacing the length of your belt minus 3 cm x 6 cm. Position it on the wrong side of the fabric. Make sure the bottom edge of your interfacing is at the center of your fabric lengthwise with seam allowances on top and on the sides. (Check out next photo below if this sounds cryptic to you.) 🙂 Iron onto the belt.
I think you can iron the interfacing directly on the fabric but I covered it with a damp cloth as shown on the photo above. I just pressed it on for about 10 seconds before moving to the rest of the fabric.
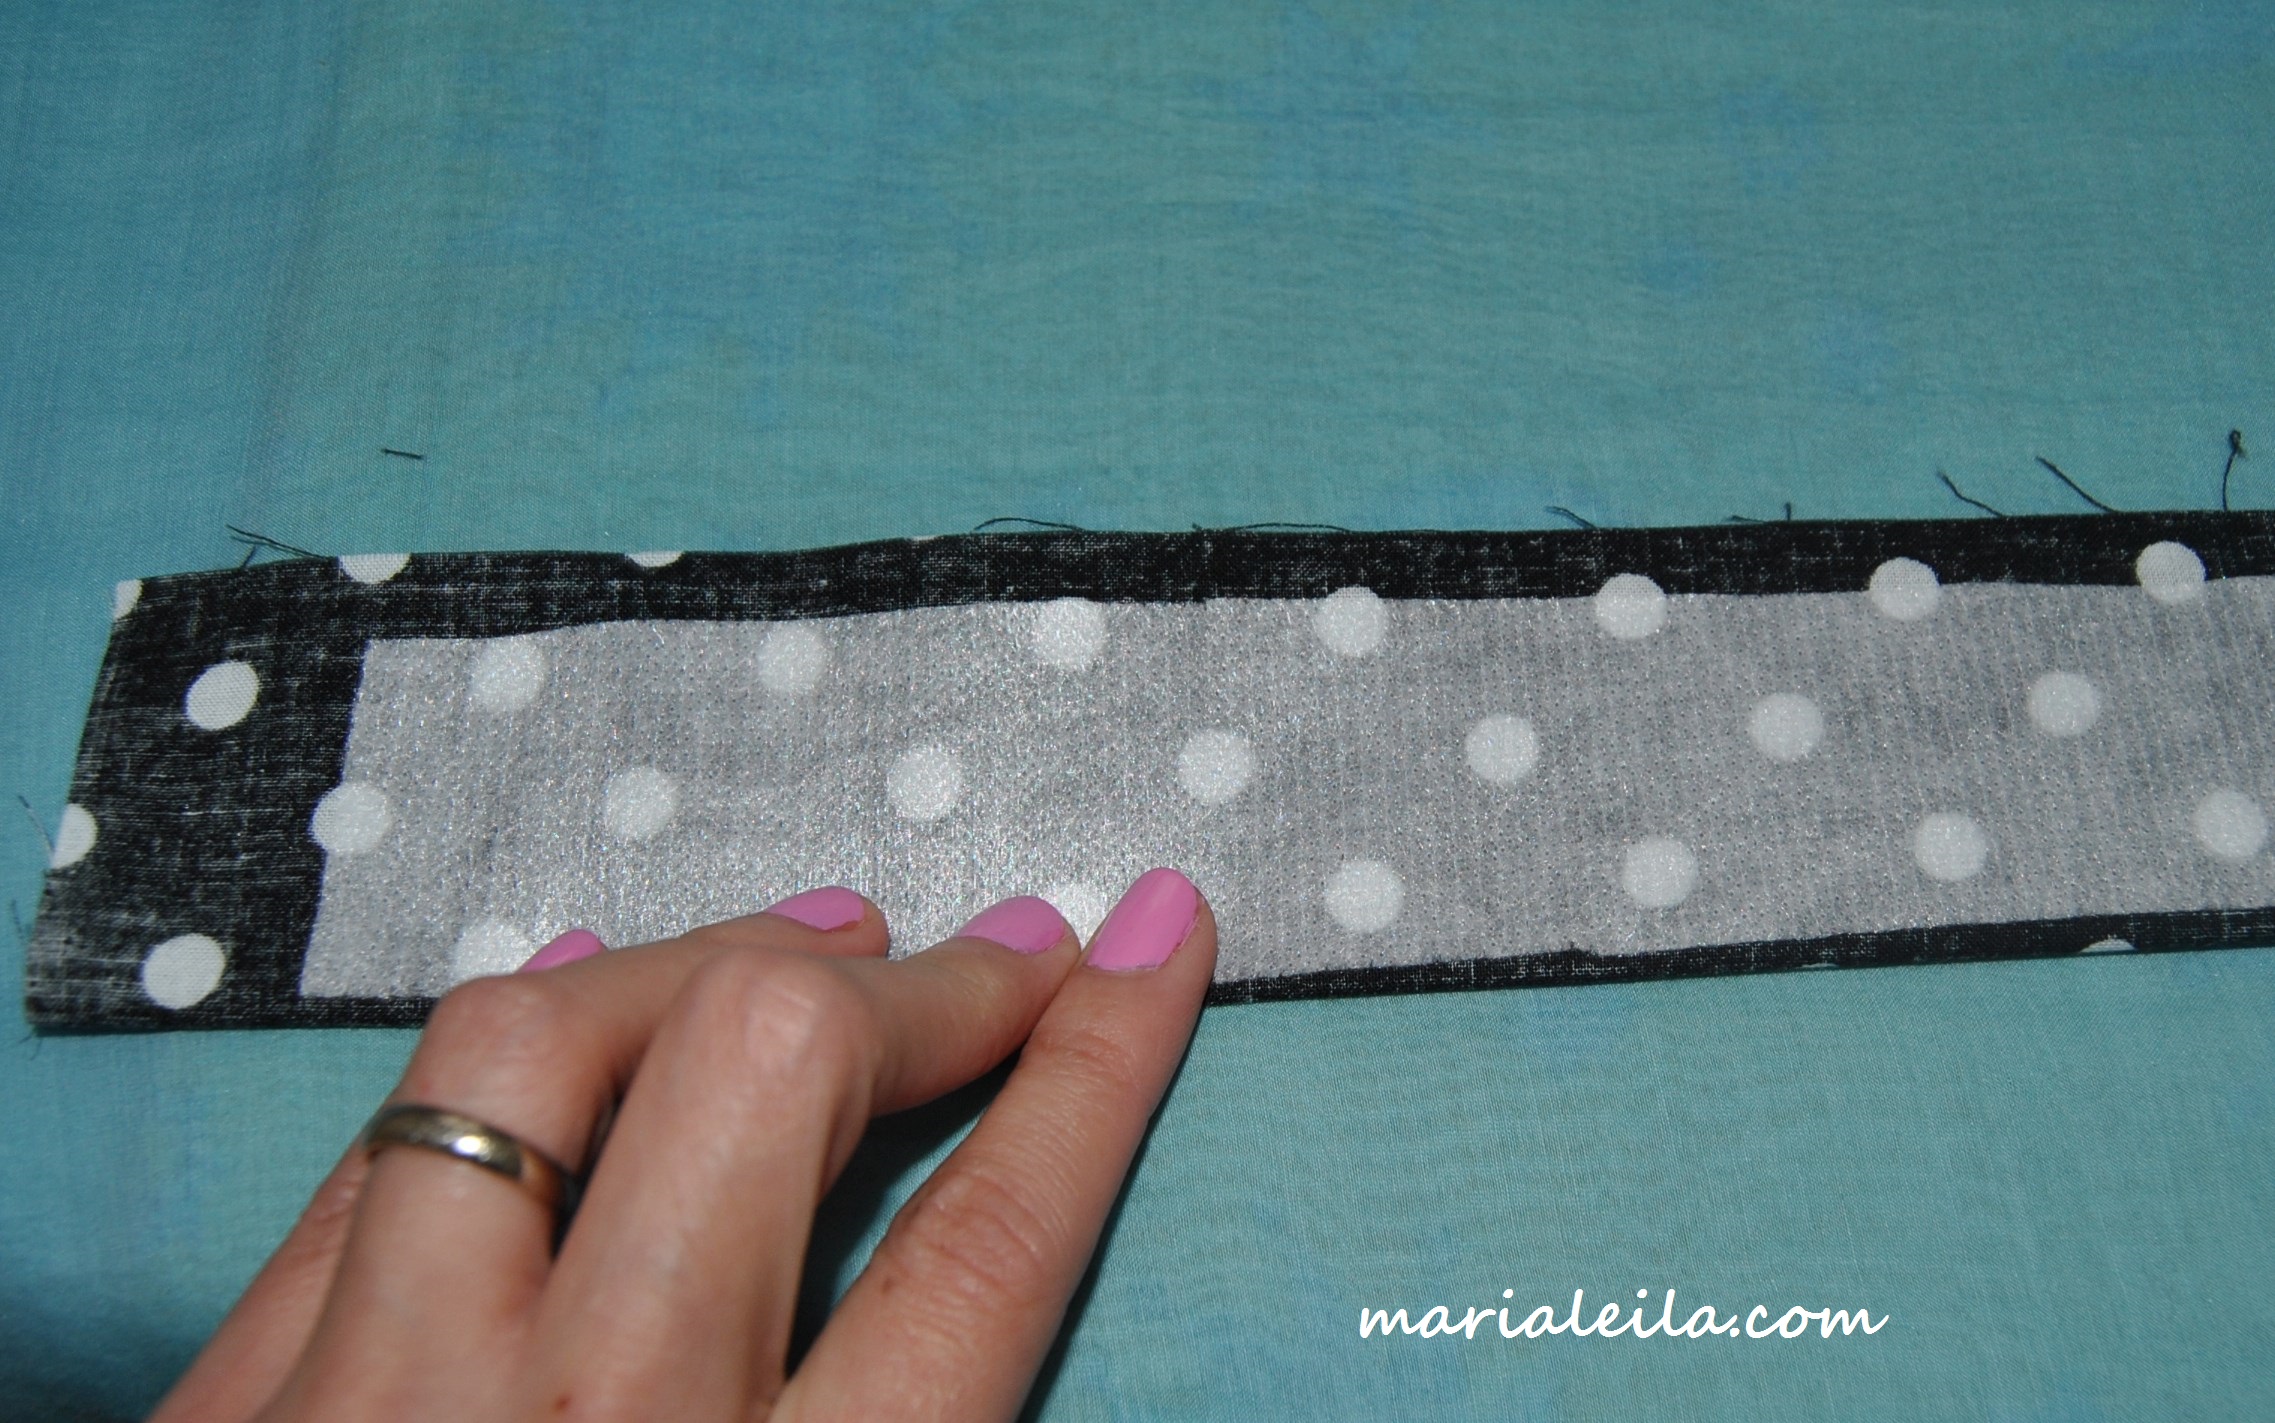 3. Fold the belt lengthwise, pretty sides together, so the interfacing is out on top. This is also what I mean about seam allowances on top and the sides. The other side is not shown here but you guys are smart so I know you pretty much get it, right?
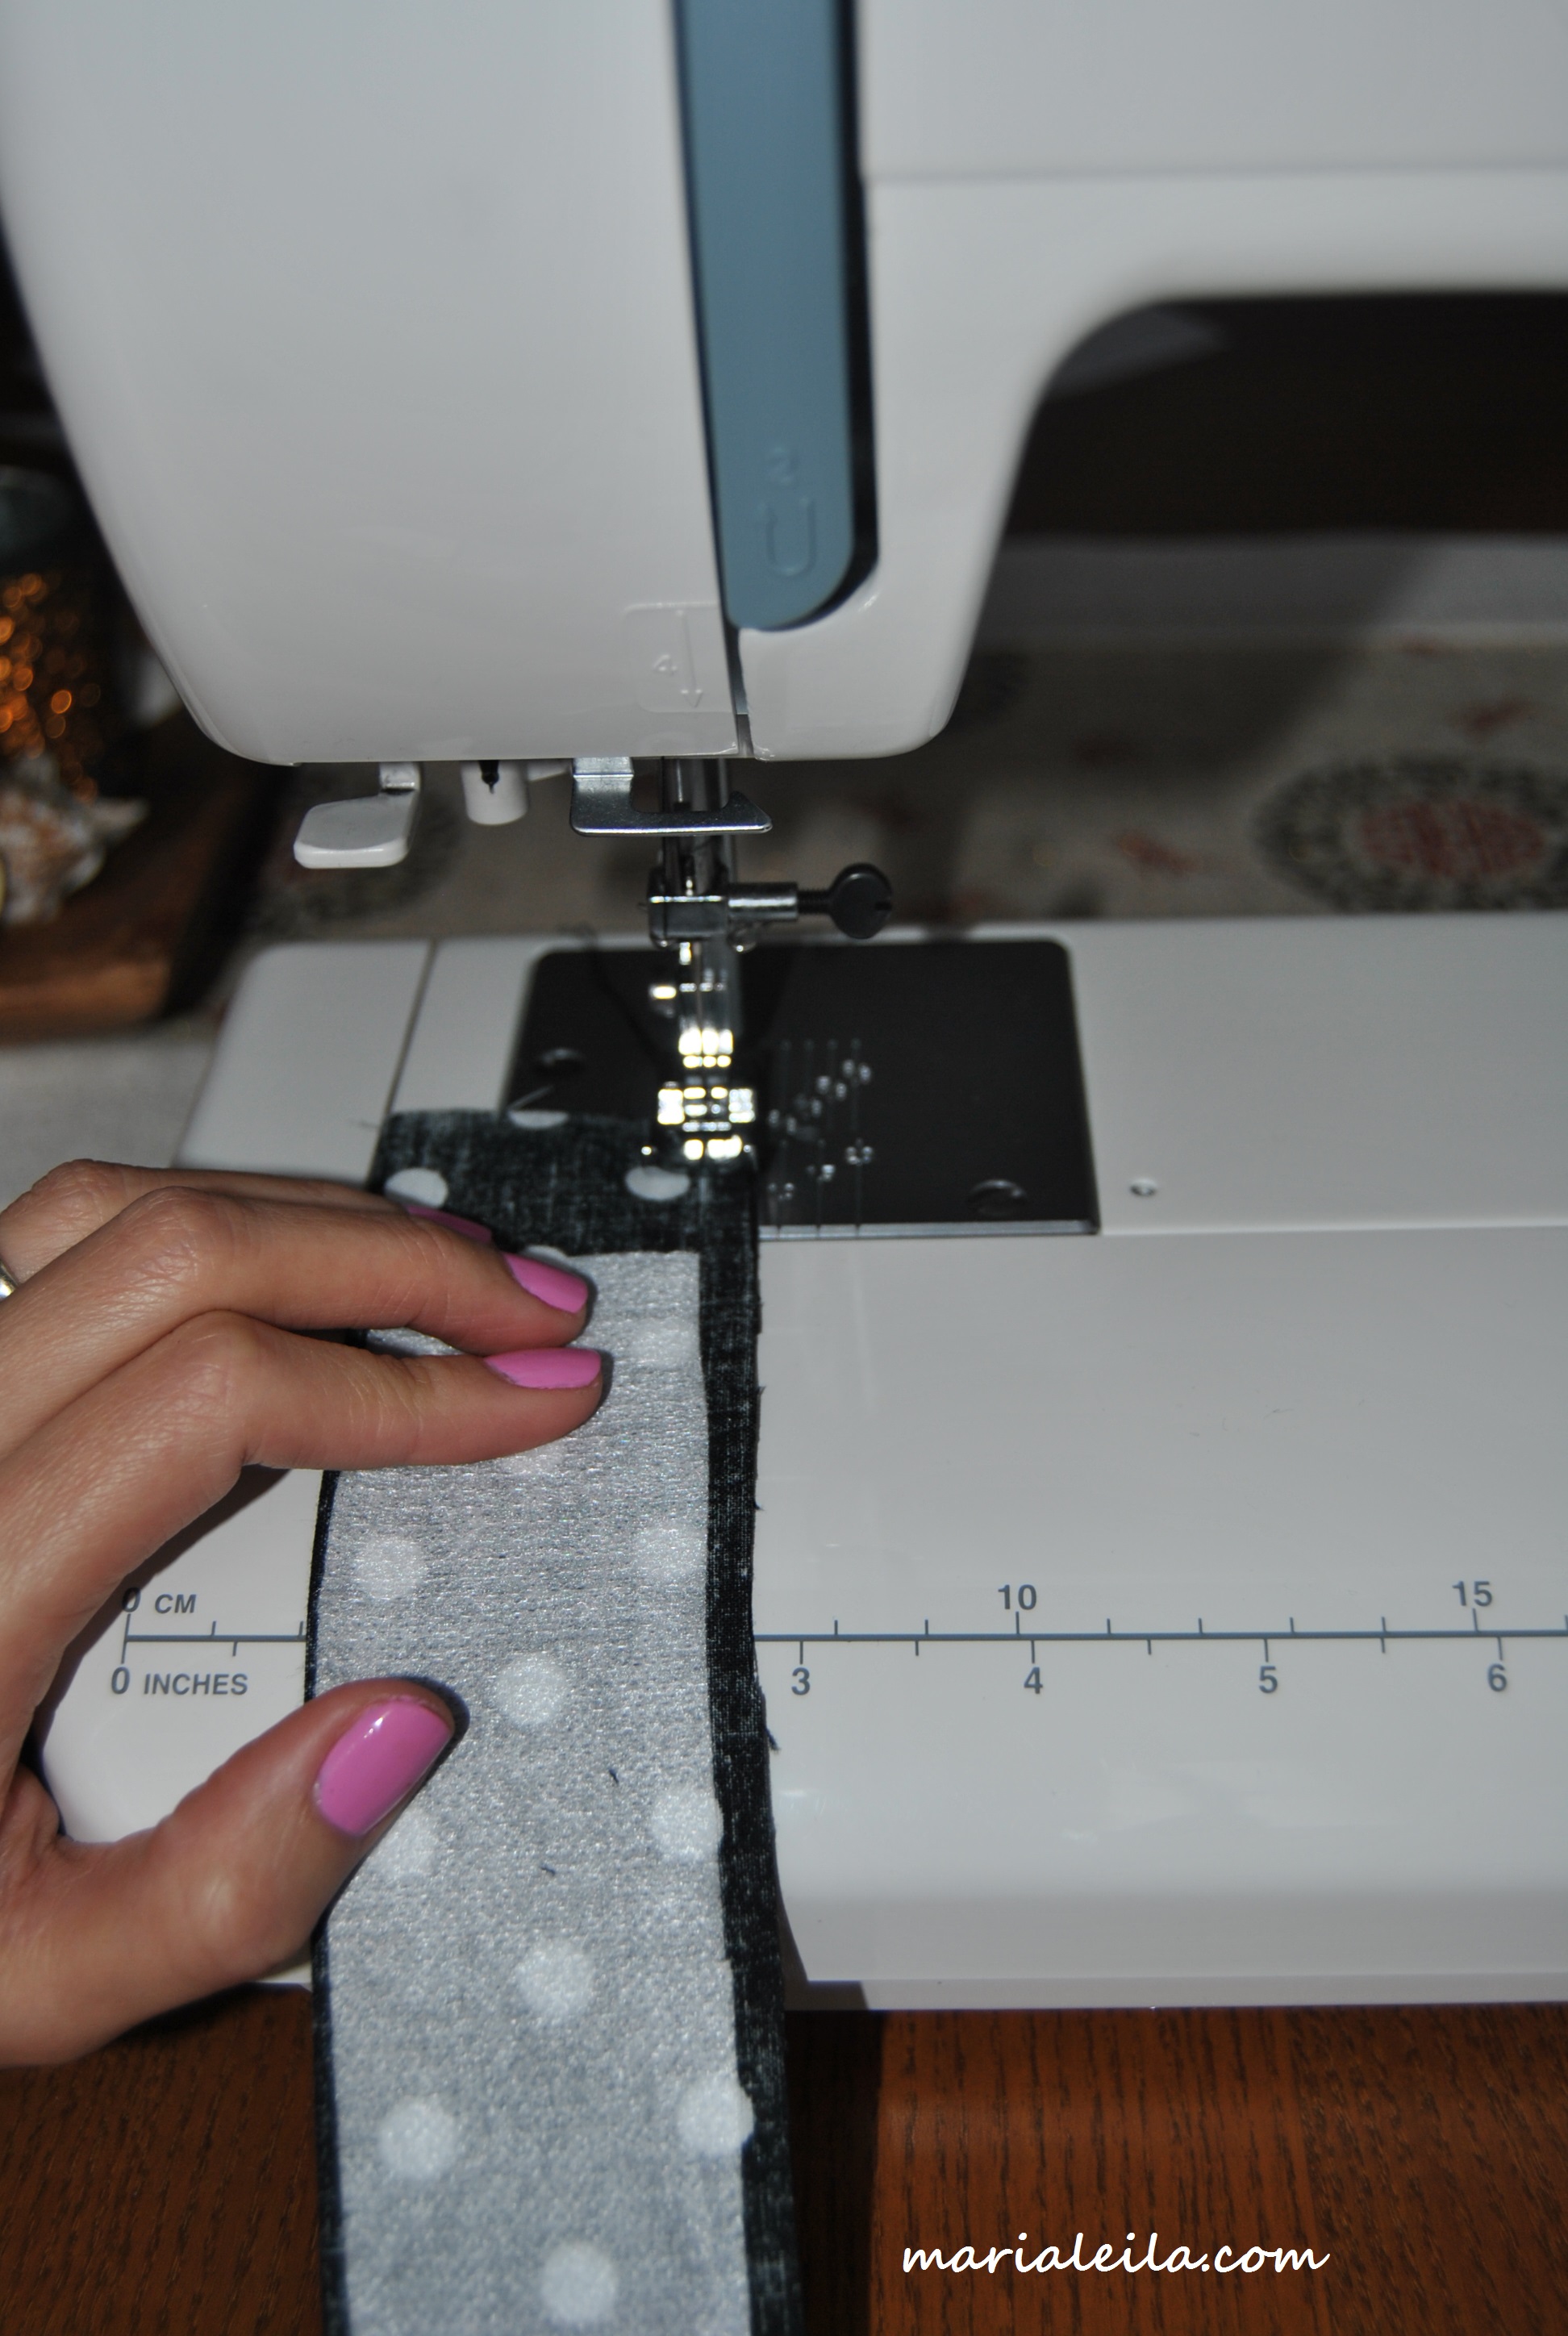 4. Stitch the seam edges leaving one side open so you can turn your belt inside out. Trim down edges.
 5. Turn belt pretty side out by slowly pushing the stitched end with, in this case, a chopstick! I don’t know why some tutorials on Youtube said this step is a pain because I did it in less than a minute, so better try my trick. Push it with the bottom of your chopstick and you get the pretty side out without breaking a sweat.
 6. Iron your belt nice and crisp. You still have one end open so the best thing to do is to slip-stitch it. But I tend to mess up with hand-sewing, let alone slip-stitching so I went the easier way by creating a really tiny hem. My fabric is black and the thread is black so you can hardly see where I cheated a bit, hehe.
 7. Next step is to make the bow. Same thing with your belt and your knot, you have to sew it first wrong sides together leaving one end open so you can turn it right sides out. Iron it also nice and crisp before running a stitch to close the end. Even with light-colored fabrics you don’t need to slip stitch the end because it wont be seen as it will be at the back of your bow.
Fold the bow in half as shown above. You can use a pin to hold the bow together while you start hand-basting long stitches in the middle through the thickness of the fabric. Push middle ends together when you’re done hand-basting and do few tight stitches to hold the gathers in place.
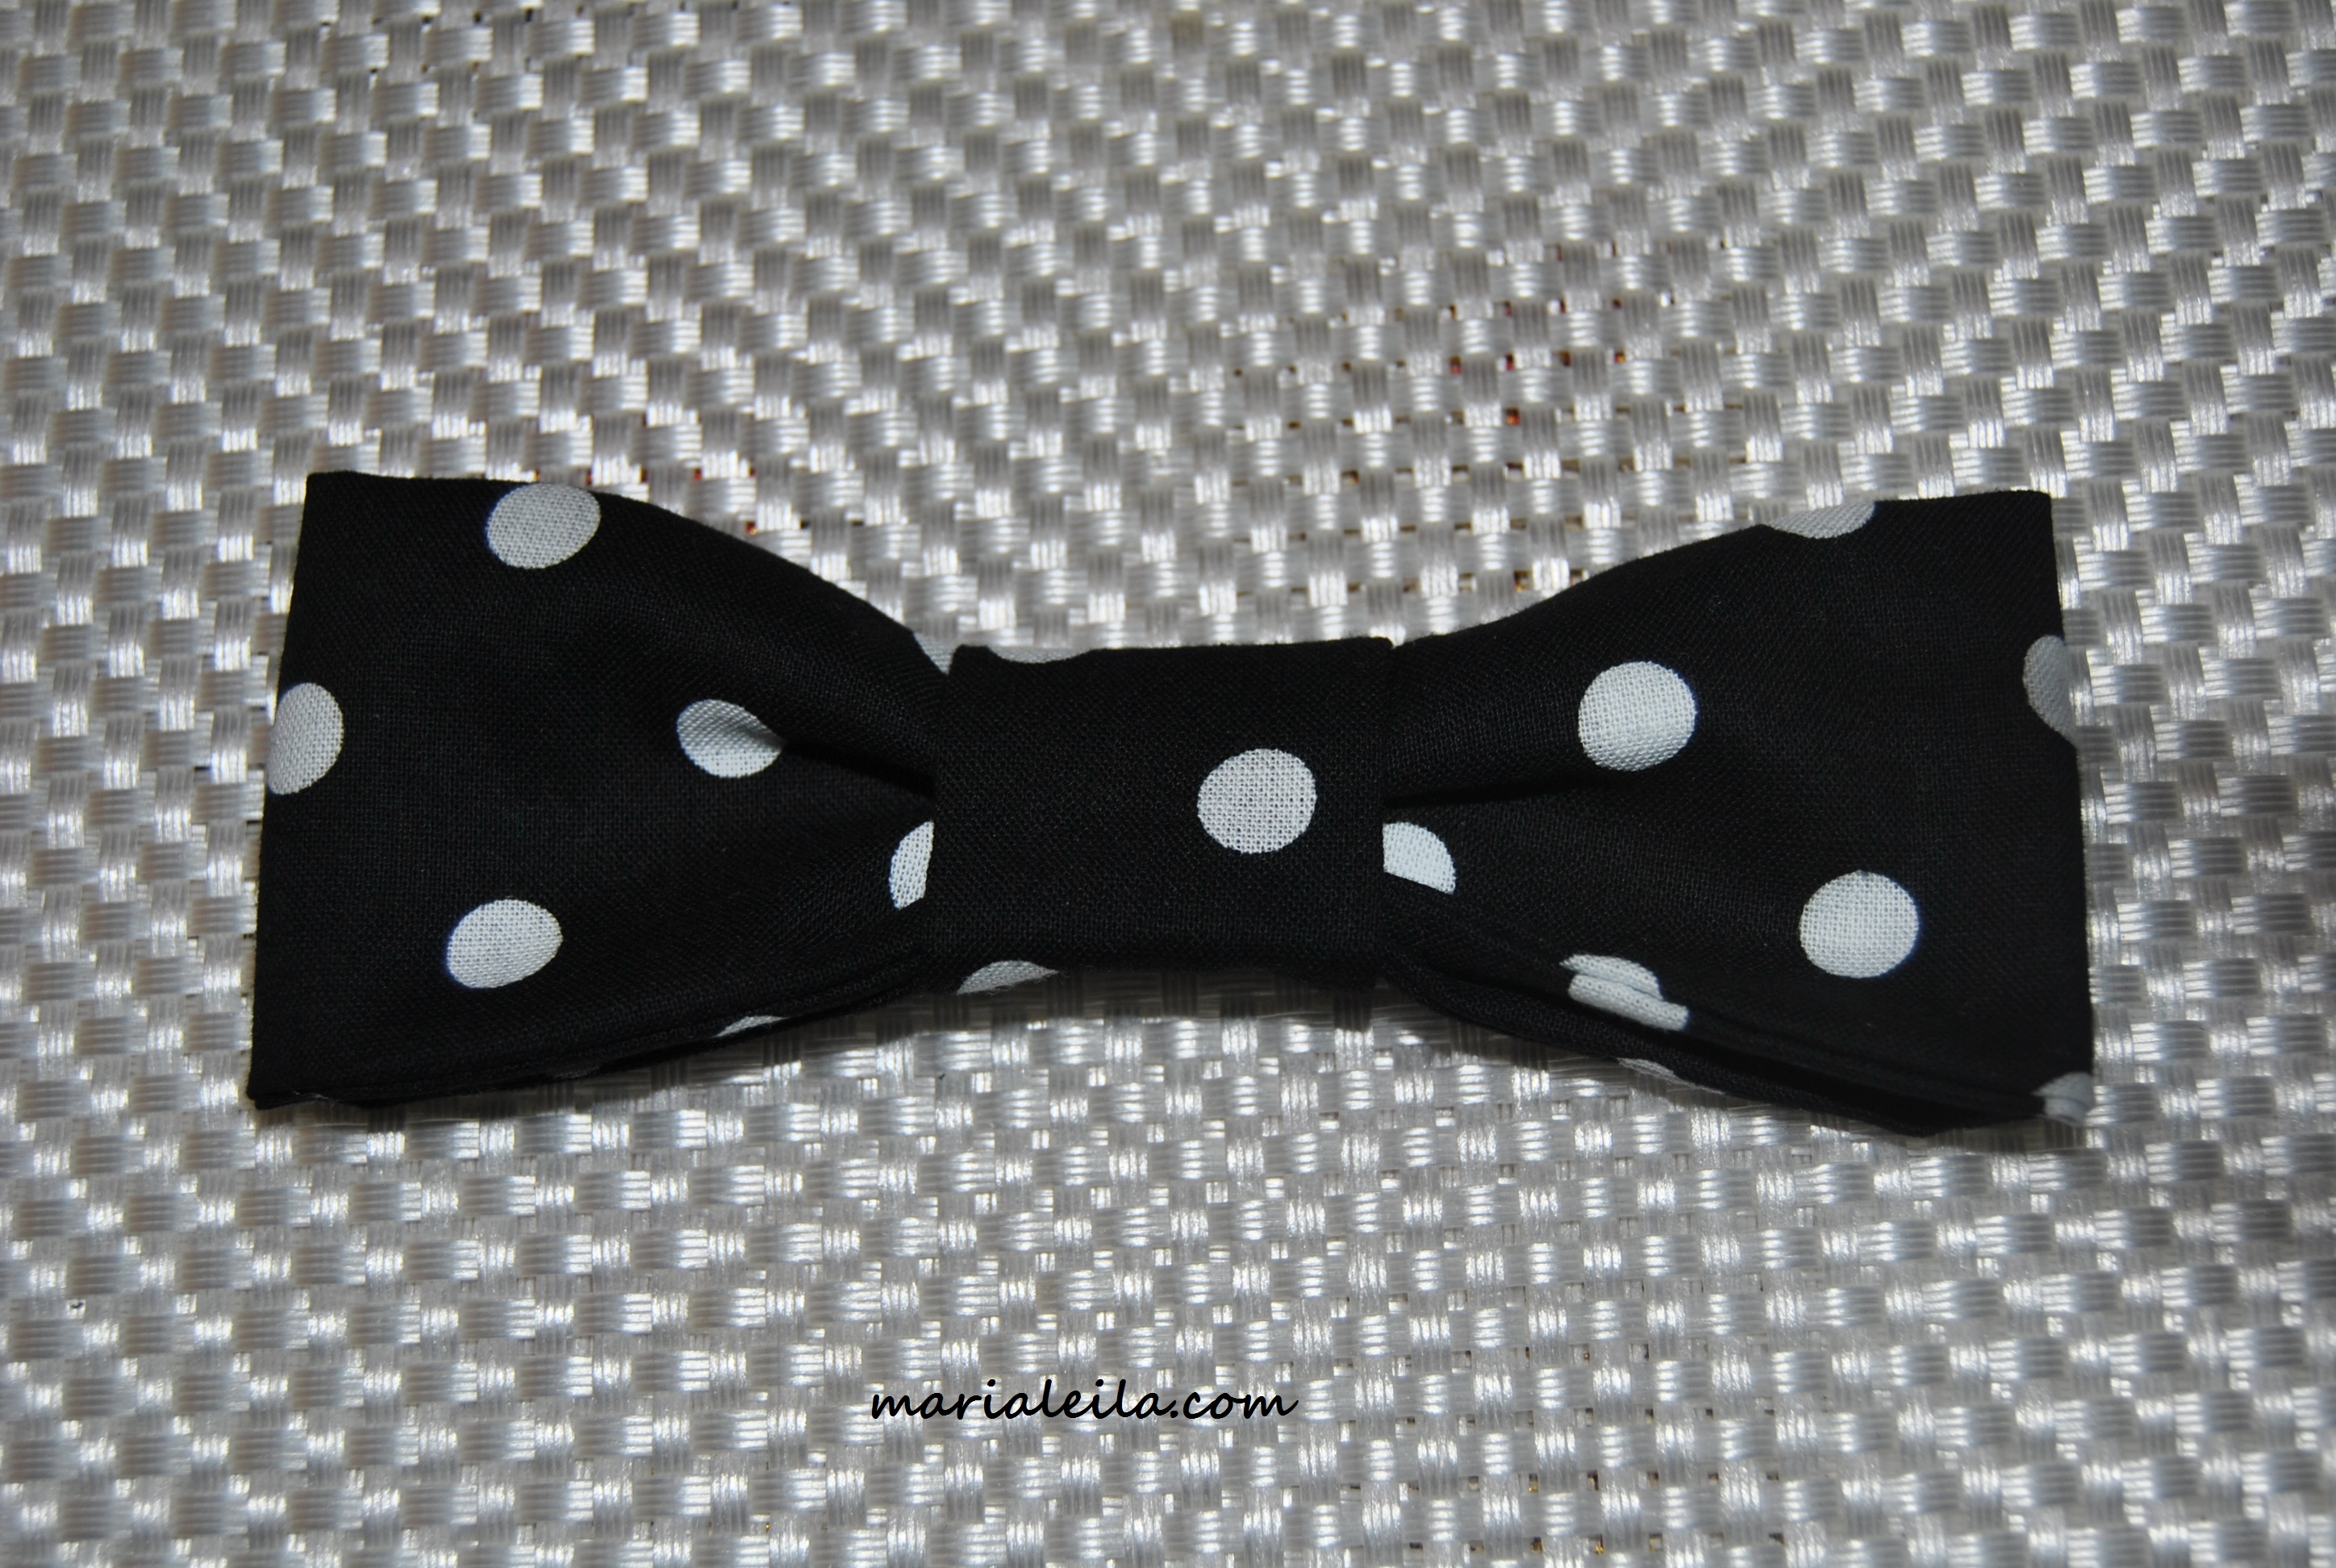 8. With your knot ironed and all seams stitched in place, put it around the middle of the bow with the ends at the back. Hand-stitch the ends shut, catching in some of the bow fabric.
Attach the bow on one end of the belt by hand-sewing it.
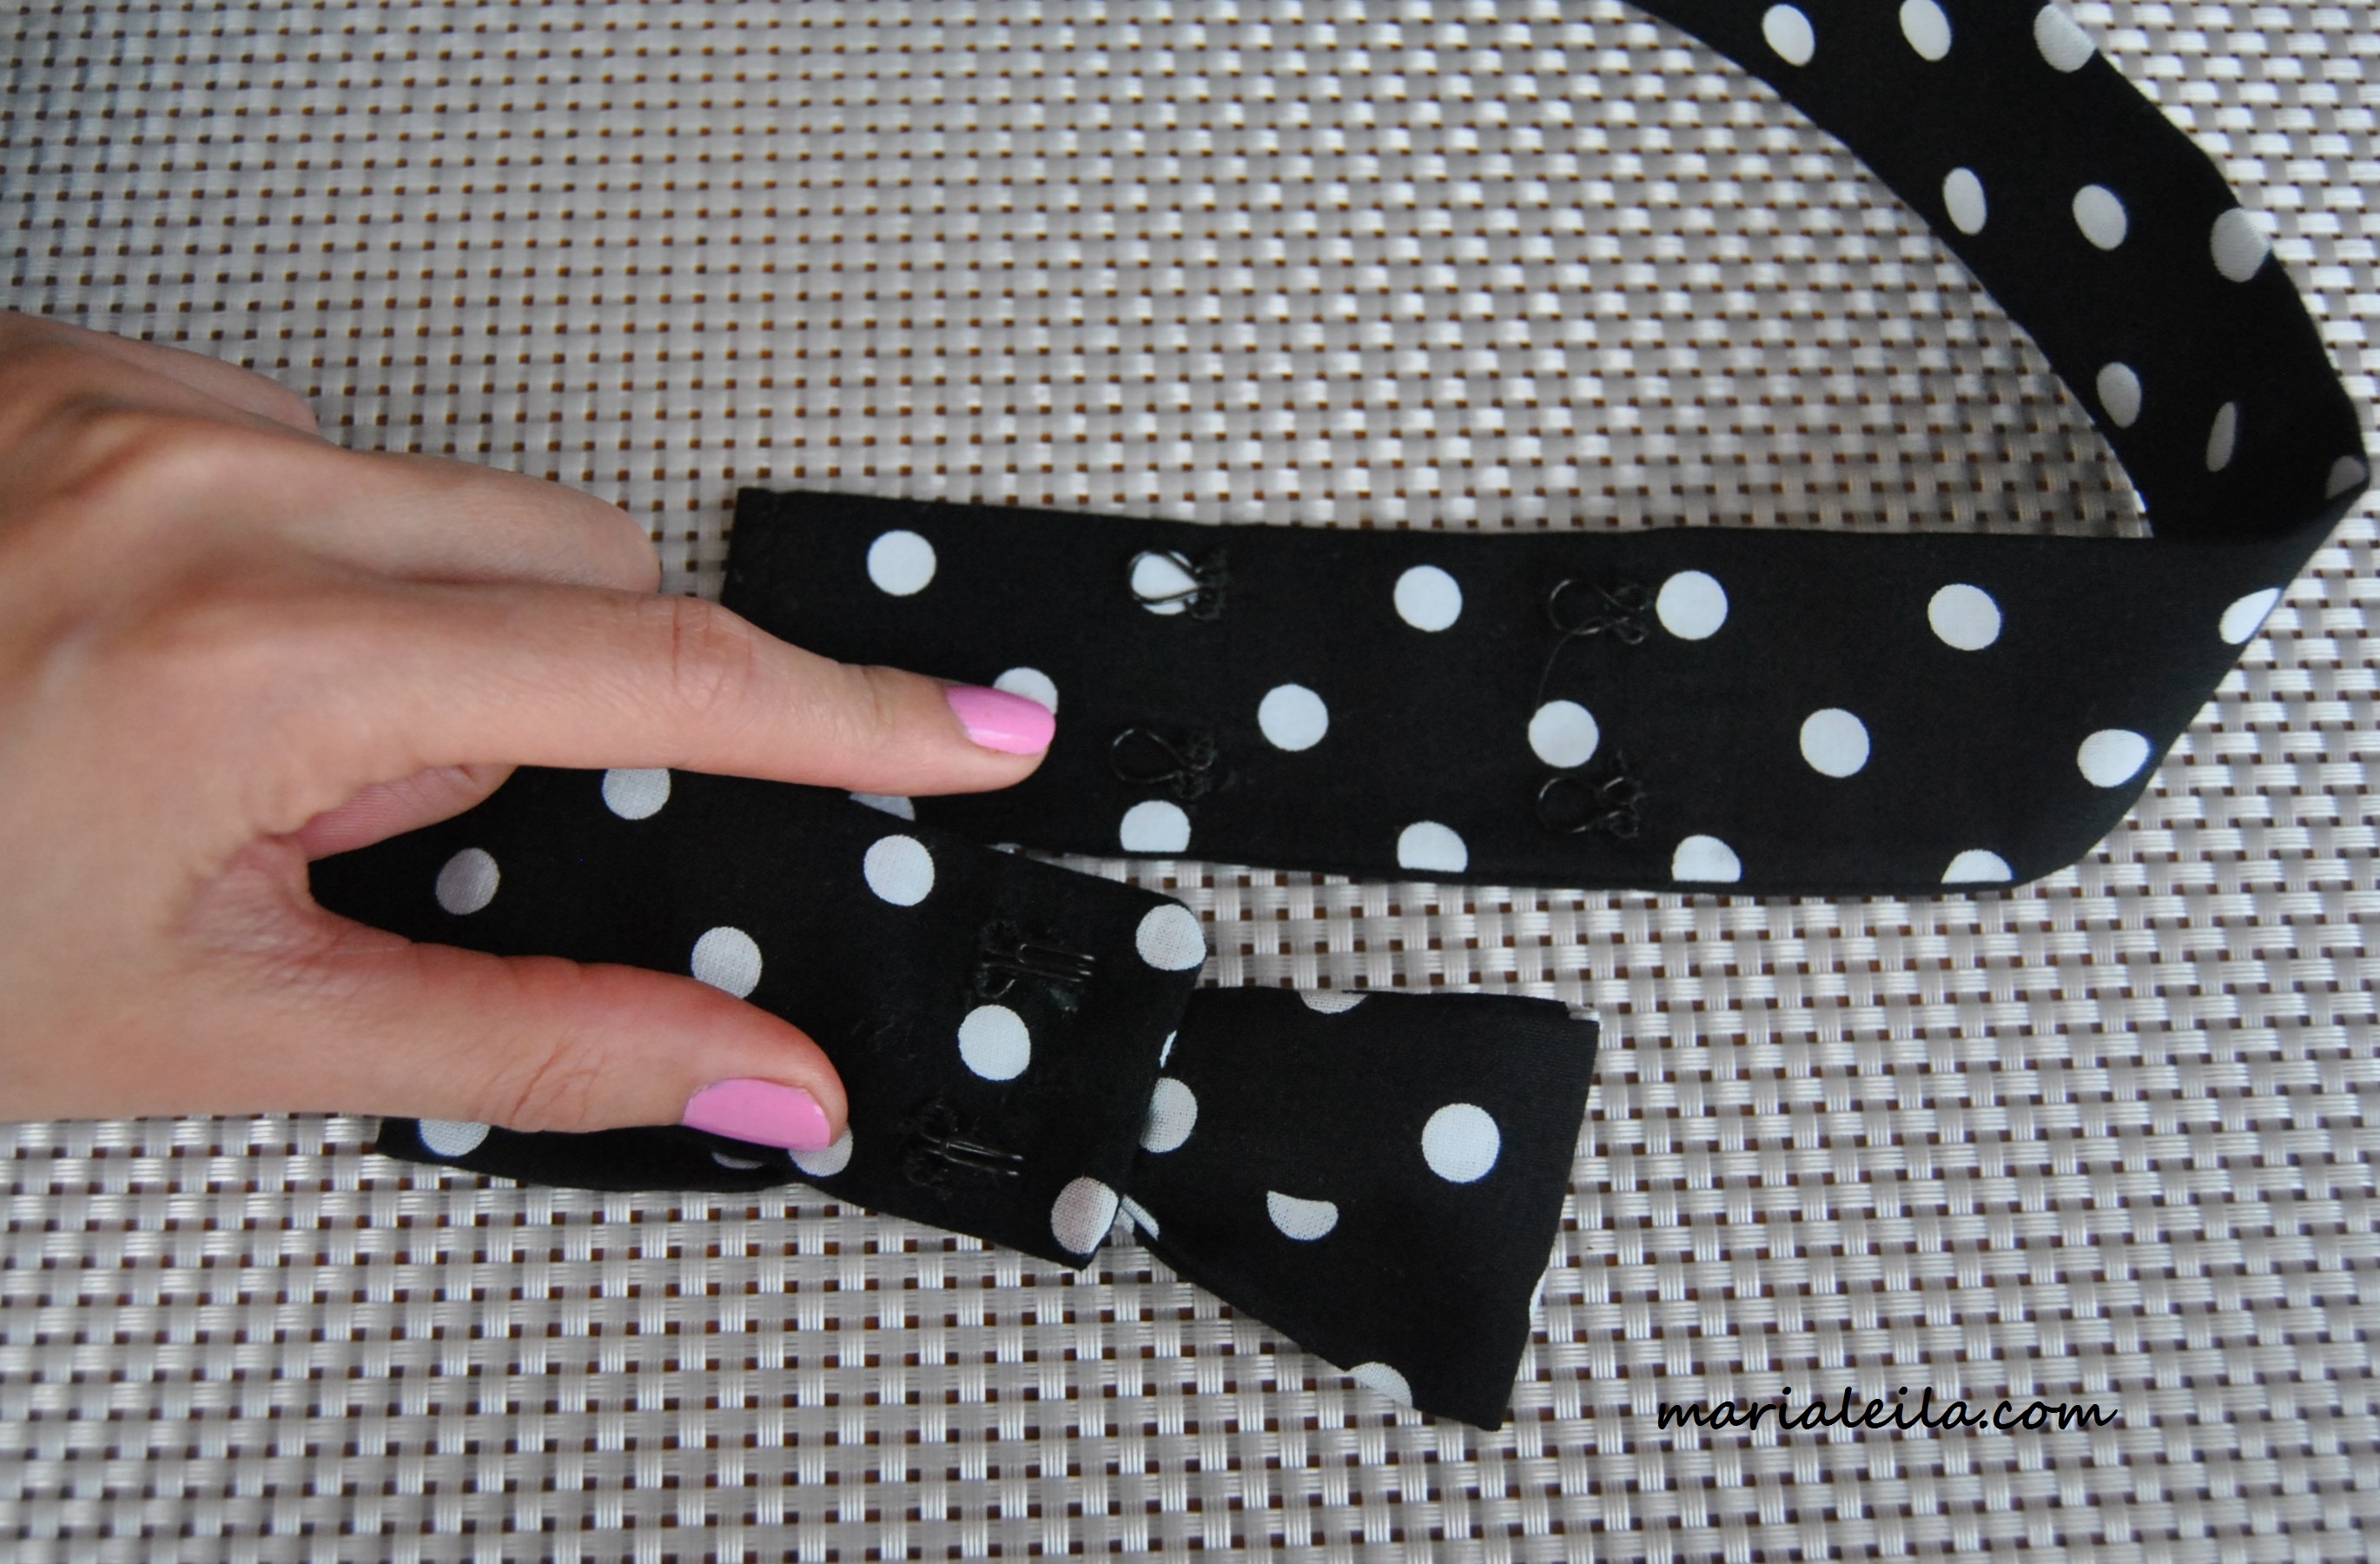 9. Sew two hooks on the back of one end of the belt where the bow is attached on the other side. Sew two sets of eyes on the opposite end, this way you have pre and post meal room options. 🙂
 Et voila! I went to a conference yesterday wearing my bow belt. My colleague said it’s super cute so I’ll be making one for her soon. Make one for yourself, too!
